This article was co-authored by wikiHow staff writer, Rain Kengly. Rain Kengly is a wikiHow Technology Writer. As a storytelling enthusiast with a penchant for technology, they hope to create long-lasting connections with readers from all around the globe. Rain graduated from San Francisco State University with a BA in Cinema.
The wikiHow Tech Team also followed the article's instructions and verified that they work.
This article has been viewed 1,537,973 times.
Learn more...
If you want to create a simple checklist or keep track of tasks in Microsoft Word, you can insert a checkmark symbol. Word has a built-in Symbols menu that includes the checkmark icon. You can easily access this in the "Insert" tab. You can also set a keyboard shortcut or apply the style to a bullet list. This wikiHow will show you how to add a checkmark symbol (✓) or checkbox to a Microsoft Word document on both Windows and Mac computers.
Things You Should Know
- Go to "Insert" → "Symbol" → "More Symbols" → select "Wingdings" → select check mark → "Insert".
- Click the bullet list arrow → "Define New Bullet" → "Symbol" → select "Wingdings" → select check mark → "OK".
- On a full-sized keyboard, use the shortcut "ALT" + "0252" (Number Pad). Change the font to "Wingdings".
Steps
Using the Insert Menu (Windows)
-
1Place your cursor where you want the check mark to appear. You can put a checkmark before, after, or in between characters.
- If you haven't installed Microsoft Office on your PC, you can install it now from https://www.office.com.[1]
- You must have a subscription to use Office 365.
-
2Click Insert. This will be on the top toolbar, between Home and Draw.Advertisement
-
3Click Symbol. This will be in the Symbols section, next to Equation.
-
4Click More Symbols…. A new window will open.
-
5Click the "Font" drop-down menu and select Wingdings. The drop-down menu will be at the top of the window, in the Symbols tab.
-
6Select the check mark symbol. When you switch to Wingdings, you'll see a new collection of symbols. Find the check mark located near the bottom of the selection. You may need to scroll down.
-
7Click Insert. This will add the check mark to your document.
- The window won't close after clicking Insert. You can place your cursor in another area and click Insert again to add another checkmark in another location.
- When you're finished, click Close to return to your document.
- If you need to add another checkmark later, click Insert → Symbol → select the checkmark from the drop-down menu. It will now appear since you used it recently.


Using the Insert Menu (Mac)
-
1Place your cursor where you want the check mark to appear. You can put a checkmark before, after, or in between characters.
-
2Click Insert. This will be on the top toolbar, between Home and Draw.
-
3Click Advanced Symbol. You can find this on the right side, next to Equation.
-
4Click Symbols. This is the left tab. You may already be on this tab.
-
5Select the check mark symbol. Scroll through the available symbols until you find the checkmark, then click it.
- If you can't find the checkmark icon, click the "Font" drop-down menu, scroll down, and select Wingdings. New symbols will appear. Select the checkmark.
-
6Click Insert. This is the blue button in the bottom-right corner. The check mark will be added to your document.
- The window won't close after clicking Insert. You can place your cursor in another area and click Insert again to add another checkmark in another location.
- When you're finished inserting a check mark symbol, click Close to return to your document.


Creating a Check Mark Shortcut (Windows)
-
1Click the Insert menu in Word. Another easy way to add a check mark to your Word document is to create a simple keyboard shortcut. Start by clicking the Insert tab, which is on the top toolbar between Home and Draw.
-
2Click Symbol. This will be in the Symbols section, next to Equation.
-
3Click More Symbols…. A new window will open.
-
4Click the "Font" drop-down menu and select Wingdings. The drop-down menu will be at the top of the window, in the Symbols tab.
-
5Select the check mark symbol. When you switch to Wingdings, you'll see a new collection of symbols. Find the check mark located near the bottom of the selection. You may need to scroll down.
-
6Click Shortcut Key…. This will be on the bottom-left corner, next to AutoCorrect....
-
7Assign a shortcut. Click the "Press new shortcut key" field if your cursor isn't already in the field. Use a combination of a modifier key (such as Alt) and an alphanumeric key.
- For example, press ALT + C at the same time. This will assign the checkmark symbol to this shortcut.
- Avoid using a combination of keys that already represents a different shortcut. (Ex: CTRL + C, which already represents Copy.)
-
8Click Assign. This will assign your shortcut to the checkmark symbol.
- Click Close on the Customize Keyboard window and Symbol window.
-
9Use your shortcut. If you set ALT + C as your shortcut, press it on your keyboard.
- The checkmark symbol will be entered wherever your cursor is.
- Make sure to save your document.


Using a Keyboard Shortcut (Windows)
-
1Place your cursor where you want the check mark to appear. You can put a checkmark before, after, or in between characters.
- This method will only work if you have a full-sized keyboard that has a numeric keypad.
-
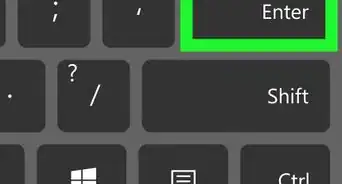
2On your full-sized keyboard, hold down Alt and type 0252. You should be using the 0252 on your number pad. This is the section on the far-right of your keyboard. Make sure your Number Lock (NumLock) is enabled.
- The character will appear as an umlaut in most fonts.
-
3Highlight the character and change the font to "Wingdings". It must be changed to Wingdings in order to appear as a checkmark.
-
4Use the on-screen keyboard (optional). Use these steps only if you don't have a full-sized keyboard.
- On Windows, type "on-screen keyboard" into the Start menu and launch the program.
- Click Options on the keyboard and check the box next to Turn on numeric key pad. Click OK.
- Click NumLock to enable it. The key will turn blue and reveal the numbers.
- Hold Alt on your physical keyboard and use your mouse to click 0252 on the on-screen keyboard.
- You may need to press any key on your keyboard for the umlaut to appear.
- Highlight the character and change the font to "Wingdings".
- On Windows, type "on-screen keyboard" into the Start menu and launch the program.


Using Character Viewer (Mac)
-
1Place your cursor where you want the check mark to appear. You can put a checkmark before, after, or in between characters using a checkmark emoji.
-
2Click the Edit menu. You'll see it at the top-right corner of your Mac's screen.[2]
-
3Click Emoji & Symbols. This opens Character Viewer, which contains many symbols and emoji you can easily add to any document.
-
4Search for the check. Type check into the search bar to filter the symbols to display only checkmarks.
-
5Click the checkmark to add it to your document. You can now insert additional check mark symbols or close the Character Viewer to return to your document.


Creating a Clickable Check List
-
1Enable the "Developer" tab in Word. If you need to create an entire clickable checklist in your document, you'll need to enable the Developer tab first. Go to File → Options → Customize Ribbon. Check the box for Developer underneath the Main Tabs header. Click OK.
-
2Click the Developer tab. After enabling it, this will be located between View and Help.
-
3Place your cursor where you want the check mark to appear. You can put a checkmark before, after, or in between characters.
-
4Click the checkmark box. This can be found in the Controls section. It looks like a box with a green checkmark inside. The checkmark box will be added to your document.
- Click the box to mark the X inside.
- This will save to your default layout, but you can always create a Word template to make it easier to create clickable checklists in the future.


Creating a Check Mark Bullet List
-
1Open a project in Microsoft Word. This looks like a W on top of a blue square. Microsoft Word is available to install for Windows and Mac.
- You must have a subscription to use Office 365.
- Use this method to create a list with checkmarks.
-
2Place your cursor where you want the check mark to appear. This is where you'll create your list.
-
3Click the bullet list arrow. This will be in the Paragraph section.
- A drop-down menu will open.
-
4Click Define New Bullet…. You can find this at the bottom of the drop-down menu.
- A new window will open.
-
5Click Symbol. This will be at the top of the pop-up window.
-
6Click the "Font" drop-down menu and select Wingdings. The drop-down menu will be at the top of the window, in the Symbols tab.
-
7Select the check mark symbol. When you switch to Wingdings, you'll see a new collection of symbols. Find the check mark located near the bottom of the selection. You may need to scroll down.
-
8Press OK twice. You'll need to click OK to close the Symbol window and Define New Bullet window.
-
9Use your checkmark list. Click the bullet list drop-down menu and select the checkmark from the Bullet Library.
- Enter any line of text you want, then press Enter to create a new checkmark on the next line.
- If needed, you can format your document if you want to adjust the style.


Community Q&A
-
QuestionHow do I insert a check mark in a box in a word document?
 Community AnswerChange font to Marlett and type a lower case "a". You'll get a check mark!



References
About This Article

1. Click Insert.
2. Click Symbol.
3. Click More Symbols.
4. Select Wingdings as the font.
5. Click the check mark.